The parameter editor
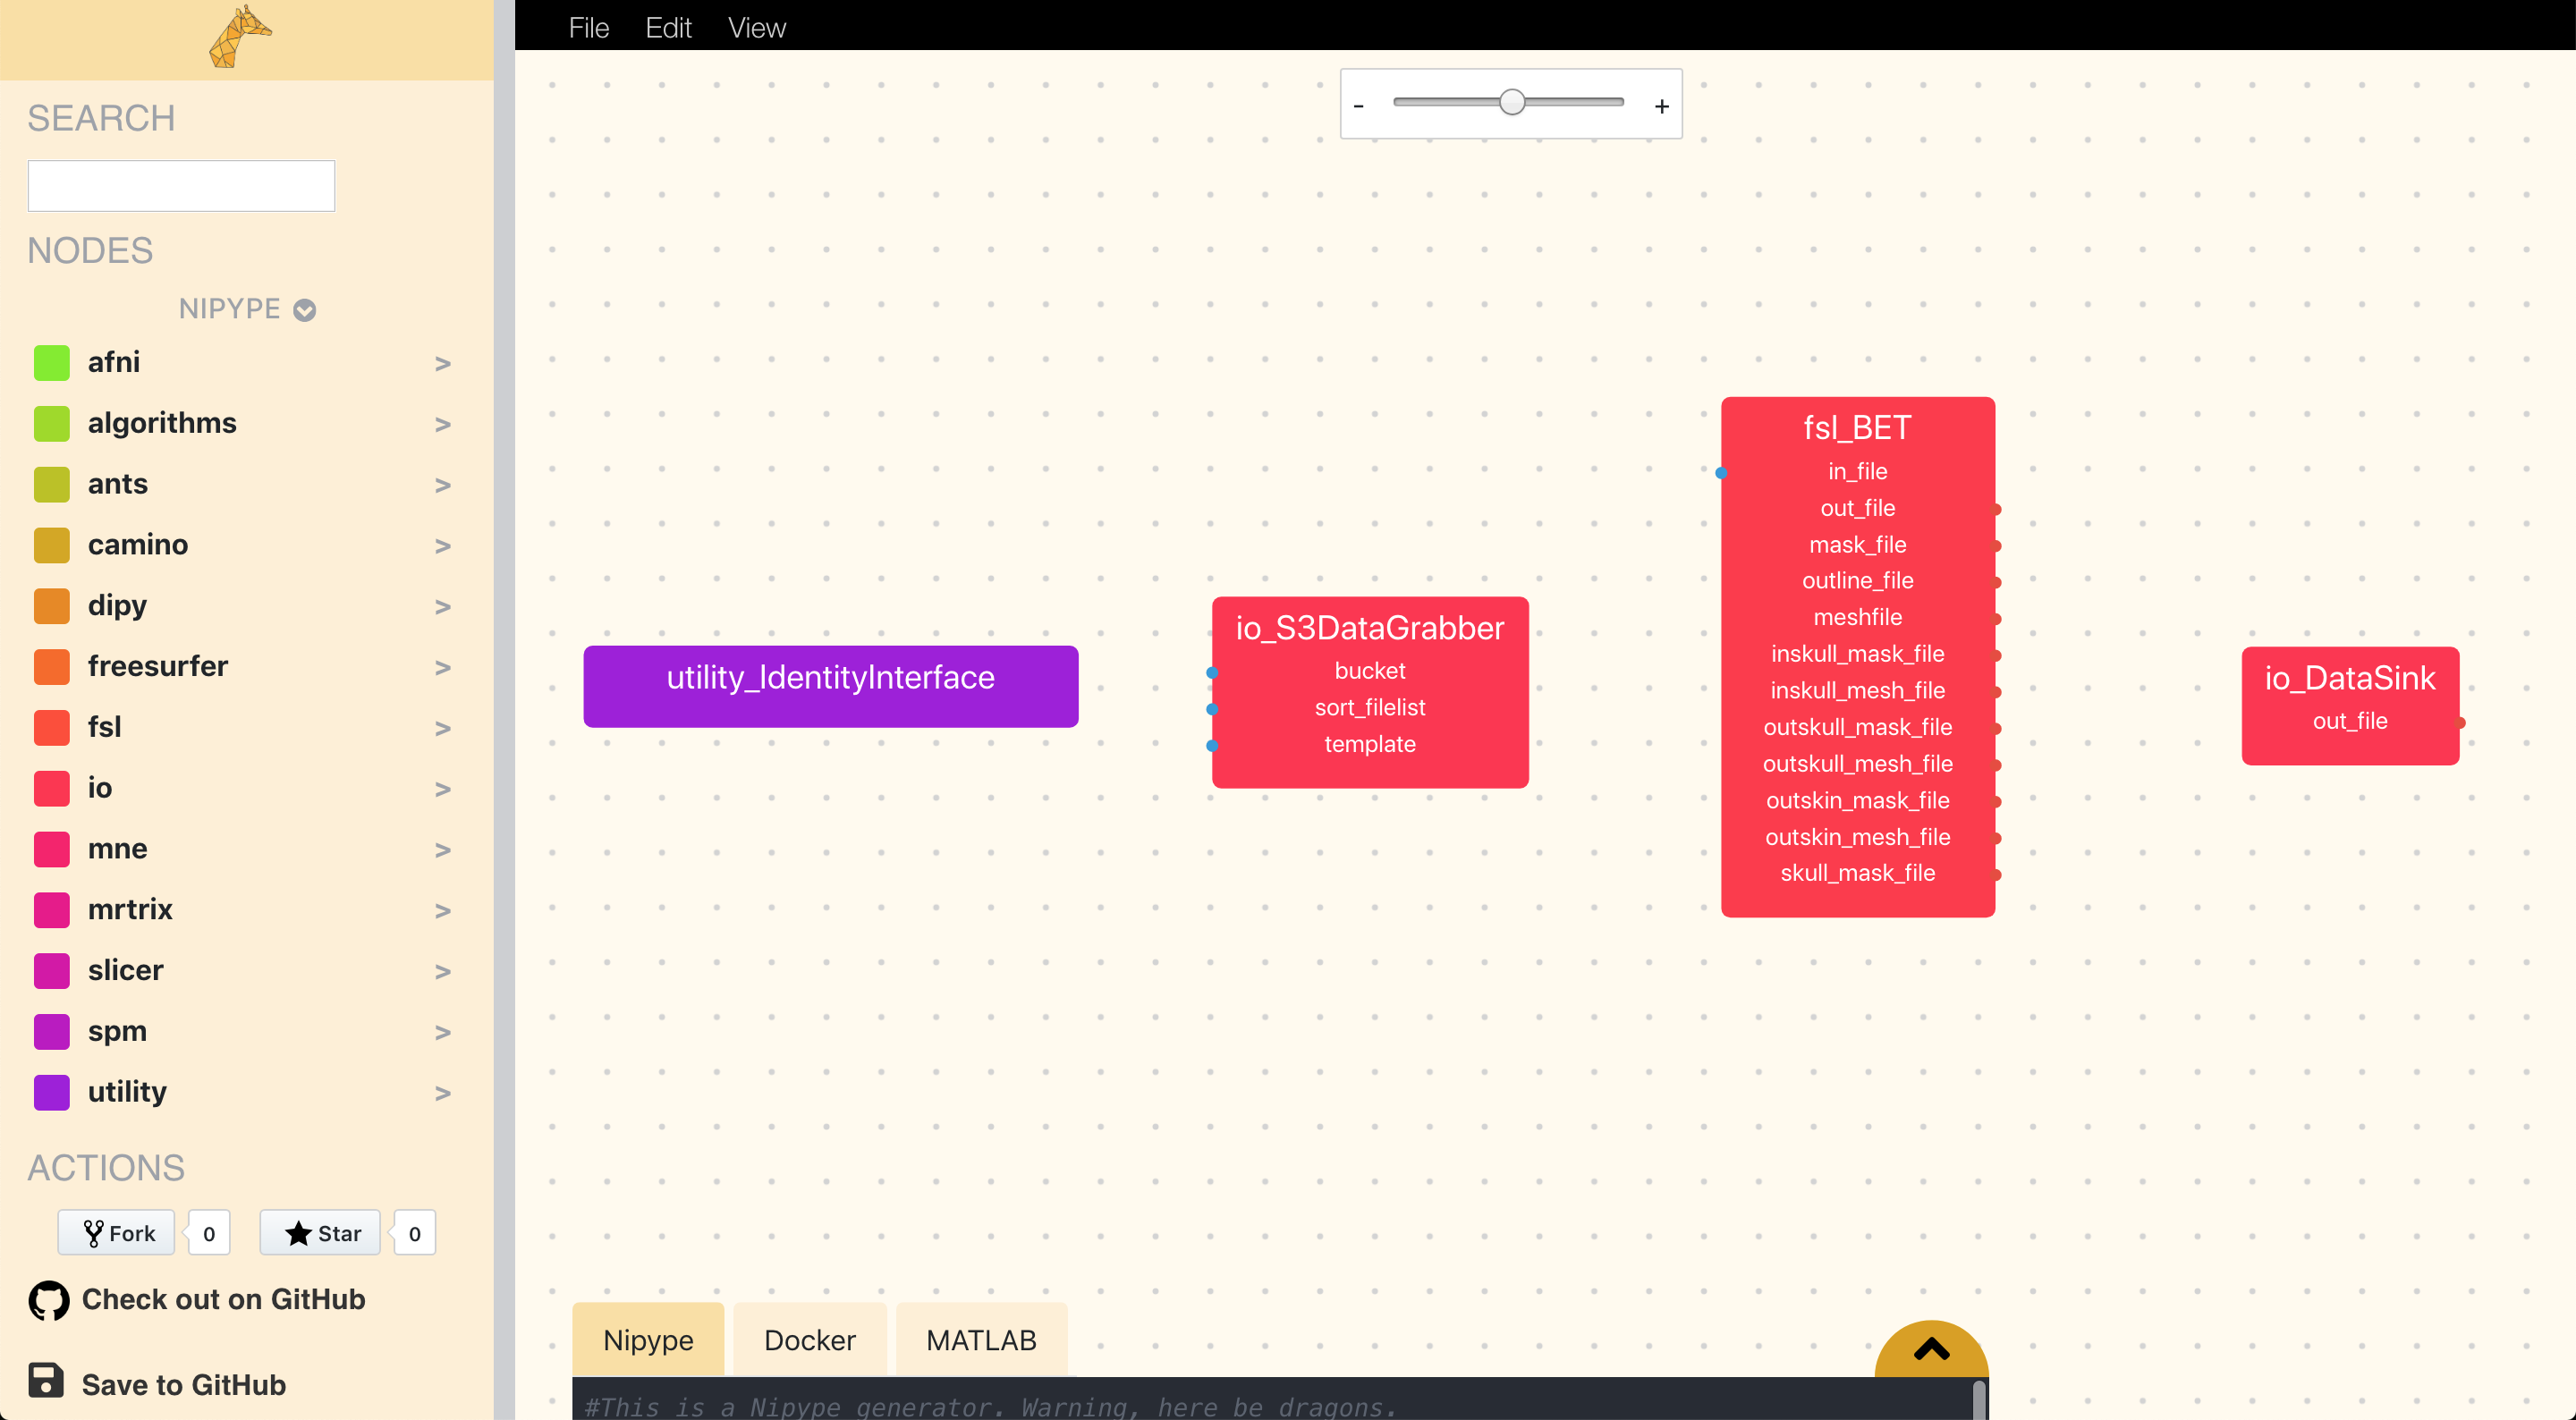
Every node in the workflow editor can be customised in the parameter editor. Below we can see each node in our skull stripping pipeline has been initialised, and we are ready to adjust the parameters of each node in the “parameter editor”.
Contents of entries in the node editor
Clicking a node in the workflow editor opens the parameter editor. Here we can see the three parts that make up each node:
- the name of the node
- the URL to the documentation of the node/interface (e.g. the Nipype documentation on
fsl.BET) represented by the blue globe-icon - all of the node’s input and output-ports.
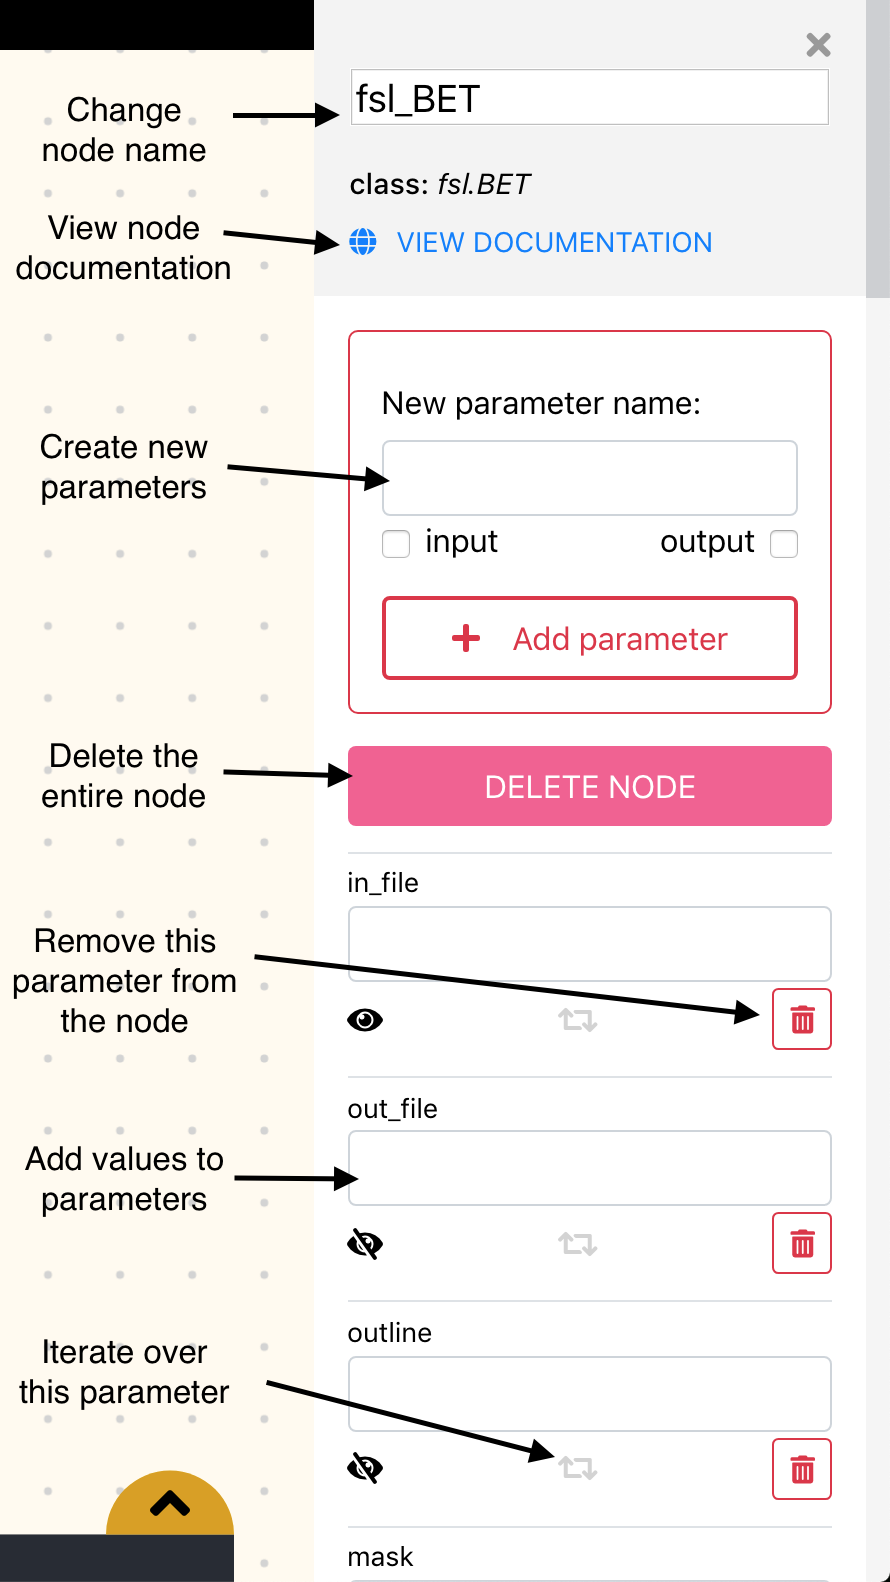
Editing input and output-ports
Each port consists of several elements relating to its functionality or
visualization. At the left of each port, its name is listed (e.g. in_file),
followed by a field in which you can manually enter a value for that input-port.
These manually entered values correspond to hard-coded parameters in your pipeline, which are thus not dependent on incoming connections from other nodes. As such,
a value for an input-port is either hard-coded or set by a connection
with another node. For example, the in_files input-port from an fsl.FAST
node may be hard-coded (like some_structural_file.nii.gz) or it may receive
a connection from the out_file output-port from e.g. fsl.BET (but not both!).
As mentioned before, upon initialization, only mandatory fields are visible
in the workflow editor (like in_file, but not e.g. mask in fsl.BET) are
editable. To visualize an input-port (e.g. mask), click on the eye-icon, which redraws the node in the workflow editor with the new input-port.
Note that whatever you write in a port’s field should conform to the syntax/idiosyncrasies of the programming language of the framework you’re using. Therefore, for Nipype-nodes, use Python syntax. For example, to input a list of images, adhering to Python’s syntax for constructing a list, you’d fill in something like:
['img1.nii.gz', 'img2.nii.gz', 'img3.nii.gz']
Also, notice that only the fields from input-ports are editable in Nipype-based nodes; output-ports are not. This is because Nipype was designed such that output-ports are not directly editable.
Other options (iterate and remove input-ports)
Then, to the right of the eye-icon you’ll see two other icons: a circular arrow and a bin, which correspond to options to make an input-port iterable or to delete a particular (manually created) input-port, respectively. We’ll leave those functionalities for now, as they are explained in more detail in other parts of the documentation (for more info on iterable input-ports, check the section on iterables and MapNodes.
Now you know how to build pipelines by initializing nodes with the node menu, connecting nodes in the workflow editor and further customizing/adapting your nodes in the parameter editor. But this does not give you anything to really execute your pipeline; for this, we need to look at Porcupine’s “code editor” in more detail in the next section!